- Design desired thing in Inkscape
- Export svg from Inkscape
- Import svg into Easel
- Position/resize svg and edit cut settings
- Create g-code in Easel
- Export g-code from Easel
- Import g-code into Chilipeppr
- Set up material and Carve
- Enjoy!
Items used in this build: (purchasing through these affiliate links helps me to hack on)
- Raspberry Pi 2 Model B Project Board - 1GB RAM - 900 MHz Quad-Core CPU
- Raspberry PI 5MP Camera Board Module
(used for time lapse)
- Milescraft 2215 1/8-Inch Downcut Spiral Router Bit for Inlays
- Con-Tact Brand Creative Covering Self-Adhesive Shelf and Drawer Liner, 18-Inches by 9-Feet, Marble White
Use Case: Direction Signs for a Wedding
My sister asked me to make some signs and things for here upcoming wedding. Since the reception will be in Wisconsin at a barn-yard like venue, she thought it would be cool to have a direction sign to point towards various activities; therefore, I needed to make something happen.After some research, I found that the USA among other countries use a font called "highway gothic" for there road signs.
Step 0: Download and install "Highway Gothic" font
I downloaded the font from here. To install, unzip the file, and copy/paste/move the ttff (TrueType Font File) in your 'fonts folder' (usually C:/Windows/Fonts).Step 1-2: Create and Export svgs in Inkscape
There are numerous tutorials on how to use inkscape, visit the google machine to learn how. Some tips I used are as follows:- To make rounded corner rectangles, select the rectangle tool, then select the rectangle you want to round. In the top right corner, click and drag the white dot to smooth out the corners.
- Make sure you make all objects as paths or it will not import into easel!

Step 3-4: Import SVGs into Easel and Modify
Since this was a relatively simple carve, I used Easel to create the g-code. To do this, import the SVG you just made, then re-size and position it as necessary.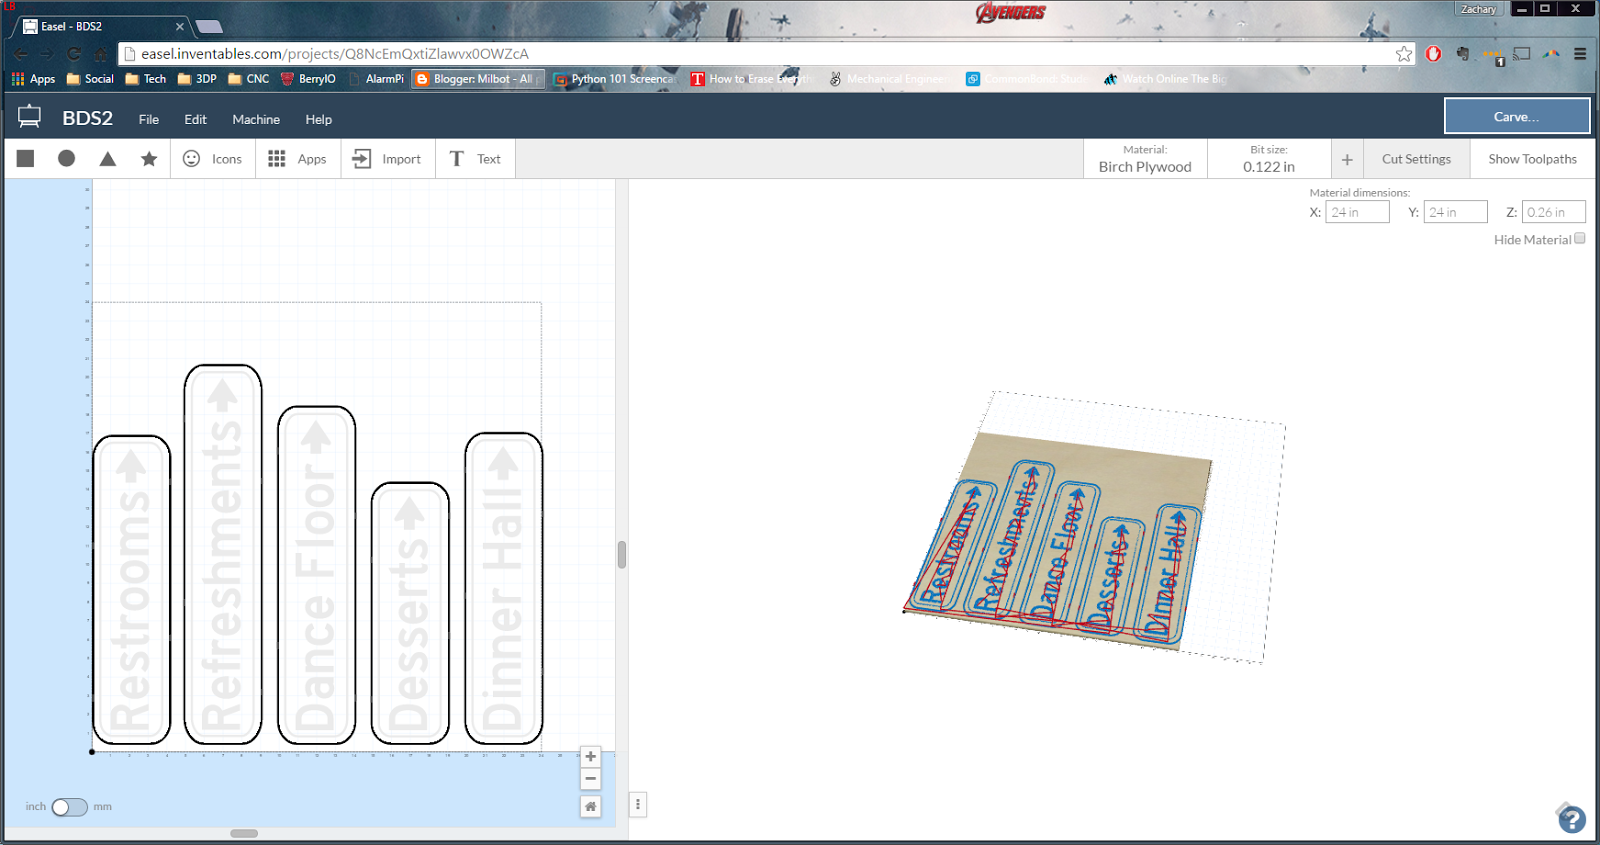
Cut settings:
- Bit: 1/8" (actual diameter: 0.122") down cut spiral bit
- Feed Rate: 40 in/min
- Cut Depth: 0.06 in/pass
- Safety height: 0.150 in
- Step over: 40%
Step 5-6: Create and Export Gcode from Easel
After everything is set up in easel how you want it, view the tool paths by clicking the 'Show Tool paths' button in the top right. If it still looks good, export the g-code by selecting 'Machine' --> 'Advanced' --> 'Generate G-code' [wait for a few seconds] --> 'Export G-code'.Step 7-8: Import G-code into Chilipper, set up material, and carve.
Copy and paste the g-code into chilipeppr. Once the g-code is loaded, ensure the carve looks like it should be.
If the carve looks correct, add your material to your machine, set up your machine and begin the carve!
Note: 1/4" plywood tends to bow a little bit; therefore, I added first carved out a drilling pattern for attaching the 1/4" to my waste board.

Step 9: Enjoy!!!

Stay tuned for a picture of the final product at the wedding in June 2016!
Learnings:
- Use a down-cut spiral bit. This will reduce the number of 'fuzzies' you have to clean up later drastically! I used a diamond cut bit, which left a smooth bottom, but a fuzzies top.
- More information on bits and there uses can be found here.
- I left the letters as cut to show the nice wood. Make sure to only cut 0.02" into the wood so you do not show the second layer of the plywood.
- If you want to paint the letters you carve out, seal the plywood before carving and cover the entire sign area with contact paper.
- After carving, paint the edges of the carve with the top color of the sign (in this case it would be green). Then paint the letters whatever color you want (I would do white in this case).
- Remove the contact paper once the paint has dried and seal the entire sign.
Build Progression:
Click here to view a time lapse of the carve (because time lapse are just awesome!)
 |
| Obtain 1/4" plywood, sand with 150 grit and 20 grit to smooth surface |
 |
| Paint the plywood |
 |
| Loosely attach plywood to waste board |
 |
| Run drill pattern and screw down plywood securely |
 |
| Begin the Carve |
 |
| Admire the masterpiece being created |
 |
| Is it just me that finds watching a CNC relaxing? |
 |
| Admire, remove, sand and repeat |
 |
| Sand (see fuzzys - look at learnings to reduce) |
 |
| Sand (see fuzzys - look at learnings to reduce) |
 |
| Almost done... |
Resources:
- https://en.wikipedia.org/wiki/Highway_Gothic
- http://www.dafont.com/highway-gothic.font
- https://www.myfonts.com/fonts/pixymbols/highway-gothic/d/
- https://www.raspberrypi.org/forums/viewtopic.php?t=51967
- http://www.raspberrypi-spy.co.uk/2013/05/creating-timelapse-videos-with-the-raspberry-pi-camera/
- http://blog.cnccookbook.com/2012/04/06/cnc-router-cutters-types-and-how-to-use-them/
No comments:
Post a Comment